Replacing the headlight bulbs on your Toyota Sequoia is a simple process. Not quite as challenging as going off-road. Rhinoceros Minibagger,800Kgs Minibagger,Rhinoceros Micro Minibagger,Xiniu Minibagger SHANDONG KEN STONE HEAVY MACHINERY CO.,LTD , https://www.chinaexcavator.com
Replacing the Headlight Bulb
Start by accessing the back of the headlight assembly. You’ll notice a rubber gasket that acts as a moisture seal. Carefully remove it to expose the wiring harness. There’s usually a small metal clip holding the bulb in place. Gently pinch the clip and pull the bulb out.
When installing the new bulb, avoid touching it with your bare hands—oil from your skin can shorten its lifespan. Insert the new bulb, reattach the clip, and replace the gasket before closing everything up.
Replacing the Headlight Assembly
If the entire assembly is damaged or needs upgrading, follow these steps:
Properly functioning headlights are essential for visibility and safety, especially at night or in poor weather. Cracked lenses, yellowed bulbs, or scratched covers can reduce light output, making driving more dangerous. By following this guide, you can ensure your Toyota Sequoia has clear, bright headlights for better visibility and safer driving.
Related Posts
 Toyota FJ Cruiser Maintenance – Headlight Bulb Change And Assembly Removal
 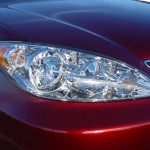 2002-06 Toyota Camry Maintenance – How To Change Headlight Bulb/Assembly
  Toyota Sequoia Maintenance – Replace Brake Pads
  Toyota Sequoia Power Window Failure Guide
 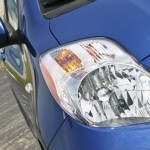 Toyota Yaris Maintenace: Headlight And Taillight Replacement
  The New Standard Features Of The 2010 Toyota Sequoia
Toyota Sequoia Maintenace – Headlight Bulb/Assembly Replacement
Are your headlights functioning correctly on your Toyota Sequoia? Is one of them out, or do you need a full headlight assembly replacement? If so, this step-by-step guide will walk you through the process. Whether you're dealing with a burnt-out bulb or a damaged housing, this tutorial is designed to help you get the job done safely and efficiently.
Find Sequoia parts here.
Before starting, make sure you have enough space to work comfortably and gather all the necessary tools. It’s also crucial to purchase the correct replacement parts—always check your vehicle manual to confirm the right bulb type or assembly for your model year.